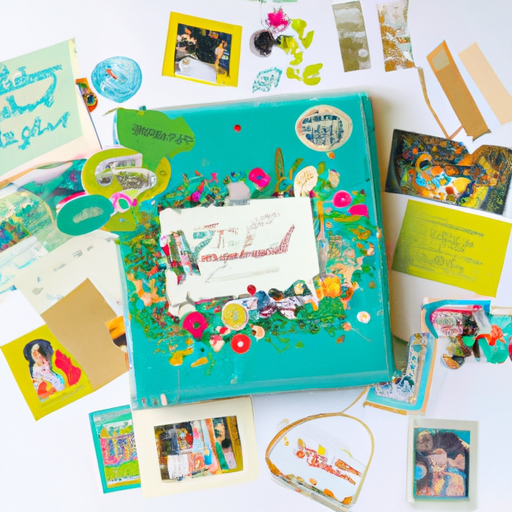
Looking to add a touch of personality and excitement to your DIY retirement album? Look no further! With our product, you can easily incorporate fun accents like stickers and paper into your album, making it a true reflection of your unique style and memories. Whether you’re creating the album for yourself or as a gift for a loved one, these engaging additions will bring joy and flair to every page. Say goodbye to a plain and generic retirement album and say hello to a personalized keepsake that truly stands out. Start adding those fun accents today and let your creativity shine! When creating a retirement album, choosing the right album is key to ensuring a successful and enjoyable project. Consider the size and style that will best suit your needs. If you have many photos and mementos to include, a larger album with more pages may be necessary. On the other hand, if you prefer a more compact and portable option, a smaller album would be ideal. Additionally, think about the style that aligns with your vision for the album. Whether you prefer a classic and elegant design or a more playful and vibrant aesthetic, there are albums available to suit every taste.
Once you have chosen the perfect album, it’s time to gather all the necessary materials. Stickers and embellishments are a fun and easy way to add personality and flair to your retirement album. Look for stickers that fit the retirement theme, such as images of balloons, party hats, or retirement sentiments. Additionally, consider including scrapbook paper and cardstock to create backgrounds or borders for your photos and mementos. Make sure to have double-sided tape or adhesive on hand to securely attach everything. Scissors and a paper trimmer will also be useful for cutting and trimming materials to the desired sizes and shapes. Lastly, have markers and pens available for adding captions, dates, or any other handwritten details you wish to include.
Before diving into the creative process, it’s important to plan the layout of your retirement album. Decide on the arrangement of the pages and consider organizing them thematically or in chronological order. This will give your album a cohesive and organized feel. Sketch out the placement of your photos and decorations on each page to get a visual representation of how everything will come together.
Now it’s time to organize and preserve your photos. Start by sorting and organizing your photos by event or date. This will make it easier to find specific memories when you’re creating your album. As you go through your photos, remove any damaged or duplicate prints to ensure that only the best ones make it into your album. If you have any particularly important or sentimental photos, consider scanning or making copies of them to include in your album. This way, you’ll have backups in case anything happens to the original prints.
Adding stickers can be a fun way to accentuate moments in your retirement album. Choose stickers that fit the retirement theme and strategically place them on the album pages. You can use stickers to highlight important moments or milestones, such as the day of retirement or special outings during retirement. Get creative with your sticker placement and have fun bringing your album to life.
Scrapbook paper is another great way to enhance your retirement album. Select coordinating colors or patterns that complement the overall theme of your album. Trim the paper to your desired sizes and shapes, and adhere it to create backgrounds or borders for your photos and mementos. This will add visual interest and depth to your album pages.
Incorporating personalized elements is a wonderful way to make your retirement album truly your own. Include handwritten notes or messages alongside your photos to add a personal touch. Use decorative pens to add captions, quotes, or additional details to your album. You can also include personalized artwork or drawings for extra creativity and customization.
To make your retirement album even more interactive, consider adding special elements like pull-outs or flaps. These features allow you to hide additional photos or notes and create a dynamic and engaging album experience. You can also include pockets to hold extra photos or important keepsakes. Another fun idea is to create a timeline or flipbook effect to showcase the progression of events leading up to retirement.
Embellishing your retirement album with ribbons and buttons is a charming way to add texture and dimension. Choose ribbons and buttons that complement the theme and colors of your album. Attach ribbons as borders or use them as page markers to easily navigate through your album. Buttons can be used as decorative accents or closures to add a touch of whimsy and elegance.
Once your retirement album is complete, it’s important to protect and preserve it for years to come. Consider covering the album with a protective sleeve or book cover to shield it from dust and potential damage. When storing your album, choose a cool and dry place away from direct sunlight, as exposure to excessive heat or humidity can cause photos to fade or deteriorate over time. For added protection, consider using acid-free page protectors to prevent any chemical reactions that may damage your photos or mementos.
In conclusion, creating a retirement album is a fantastic way to celebrate and cherish the special moments and memories of this milestone in a person’s life. By considering the size and style of the album, gathering the necessary materials, planning the layout, organizing and preserving photos, and adding fun accents like stickers, scrapbook paper, personalized elements, interactive pages, and embellishments, you can create a beautiful and meaningful tribute to someone’s retirement journey. Remember to protect and preserve your album properly to ensure that it will be enjoyed for many years to come. Happy crafting!